
In iStorage Server you can create a Security Images for every Client Machine. Thanks to this option every employee can have its own private encrypted space where he/she can store important data that can’t be accessed by anyone else.
You can create such image using iStorage Server in just few steps:
You can create such image using iStorage Server in just few steps:
1. Open iStorage Server Management Console.
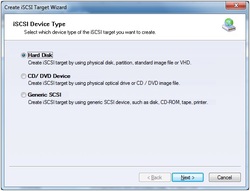
2. Click Create button to create a new target.
3. Chose creation of Hard Disk.
3. Chose creation of Hard Disk.
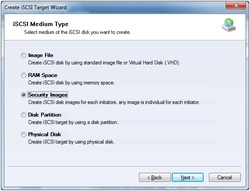
4. Choose Security Images to create an encrypted image.
5. Select where to save the file as well as the size of it.
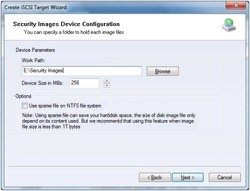
Checking option Use sparse file on NTFS file system can help you save disk space but it is not recommended to use on when the image file is bigger than 1T bytes.
6. Choose the Authentication Mechanism.
6. Choose the Authentication Mechanism.
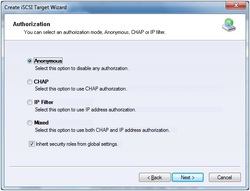
- Anonymous
- CHAP (Challenge-handshake authentication protocol)
o All initiators need to specify a CHAP user and secret to connect to the target. iStorage Server has a built-in user called “Guest”, which is used for initiators without CHAP secret specified.
- IP Filters
- Mixed
If you check Inherit security roles from global settings, all client security roles are form global settings, otherwise, each client will have its own permission.
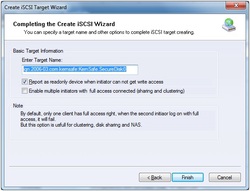
7. Choose name for your Security Image file.
If you check Report as readonly device when initiator cannot get write access, the system will give you a report when you load the target without write access.
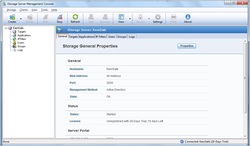
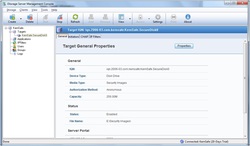
After creating the image, you can check information about it in the General Tab.
After creating the image, you can check information about it in the General Tab.
Connecting to the Security Image is even easier:
1. Open iSCSI Initiator.
1. Open iSCSI Initiator.
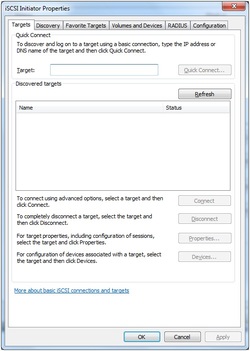
2. Select the Discovery tab page.
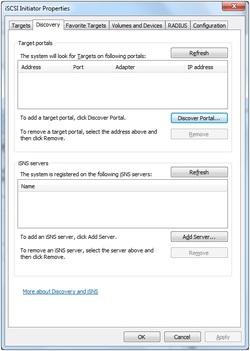
3. Press the Discover Portal… button, the Discover Target Portal dialog will appear.
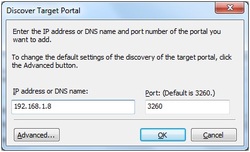
Type the IP address and Port of your server. Default port is 3260.
4. Change to Targets tab.
4. Change to Targets tab.
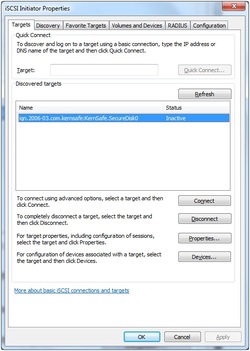
Select the target in the Targets list, and then press the Connect button.
Then the Connect to Target dialog will appear.
Then the Connect to Target dialog will appear.
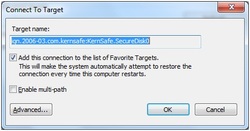
If your iSCSI target is using IP filter or Anonymous authorization, just press the OK button to continue.
Check Add this connection to the list of Favorite Targets, to log-on this target automatically after system boots.
If your iSCSI target is using CHAP user authorization, press the Advanced… button, the Advanced Settings dialog will appear.
Check Add this connection to the list of Favorite Targets, to log-on this target automatically after system boots.
If your iSCSI target is using CHAP user authorization, press the Advanced… button, the Advanced Settings dialog will appear.
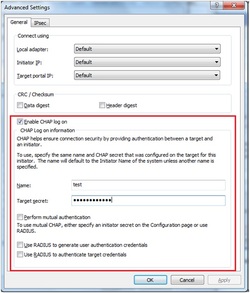
Select Enable CHAP log on and type Name and Target secret.
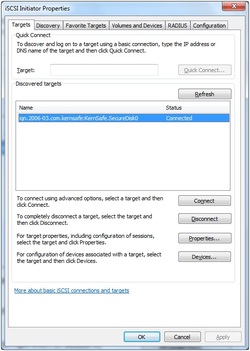
Now you are successfully connected to the iSCSI target.
Open Disk Management (Right click on to Computer, click Manage, from the tree list on the left side choose Disk Management).
Open Disk Management (Right click on to Computer, click Manage, from the tree list on the left side choose Disk Management).
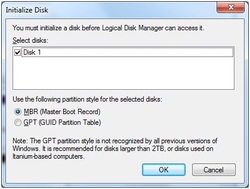
An Initialize Disk window will appear.
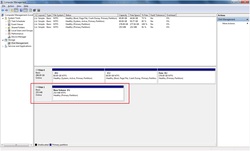
6. After clicking OK, you can format your new Security Image and use it as if normal hard drive.
6. After clicking OK, you can format your new Security Image and use it as if normal hard drive.
 RSS Feed